
How to Make Leaf Mould From Autumn Leaves (UK)
Published 26 August 2026
Turn a wet autumn carpet of leaves into the best free soil conditioner in the garden. Six steps from collecting and sorting through to bagging, keeping it damp, and knowing what one year and two year leaf mould are each good for.
We earn commission from qualifying Amazon purchases. It costs you nothing and does not affect what we recommend.
Quick Answer
Rake up fallen deciduous leaves between October and December, dampen them if they are dry, and pack them into pierced bin bags or a wire mesh cage in a shaded, sheltered corner. Fungi break leaves down in a cold, slow process, so leave the pile alone for about a year for a coarse mulch and two years for fine, dark, crumbly seed compost grade. Keep it damp, keep evergreens and conifer clippings out, and that is genuinely the whole job.
- Collect Your Leaves While They Are Damp
- Sort the Good Leaves From the Slow and the Wrong Ones
- Choose Your Method: Bin Bags or a Wire Cage
- Damp the Leaves Down and Pack Them In
- Leave It Alone, but Never Let It Dry Out
- Know When It Is Ready and What Each Grade Is For
- Frequently Asked Questions
- Related Reading
Autumn in a British garden ends the same way every year. A soggy brown blanket over the lawn, leaves in the gutters, a path you would not trust in smooth shoes, and then several bags of the stuff hauled off to the tip or stuffed into the council green bin. Left in a quiet corner instead, those same leaves turn into leaf mould: dark, crumbly, sweet-smelling material that improves soil structure better than almost anything you can buy.
The important thing to understand before you start is that leaf mould is not compost, and it is not made the same way. Garden compost is the work of bacteria, which run warm and fast on nitrogen-rich material and can give you a usable result in months. Leaves are broken down by fungi instead, in a cold, slow process with no heat and no real turning. That is why leaves sit stubbornly in a compost heap and why leaf mould takes one to two years. You cannot hurry fungi the way you can hurry bacteria.
The upside is that the work is all front-loaded into a few damp weekends in autumn. Get the collecting, sorting and wetting right now and the pile asks almost nothing of you afterwards. Here are the six steps in order, plus the parts most guides skim over: which leaves are actually worth gathering, when bags beat a cage, how far the pile will shrink, and what one year mould is good for that two year mould is not.
Collect Your Leaves While They Are Damp
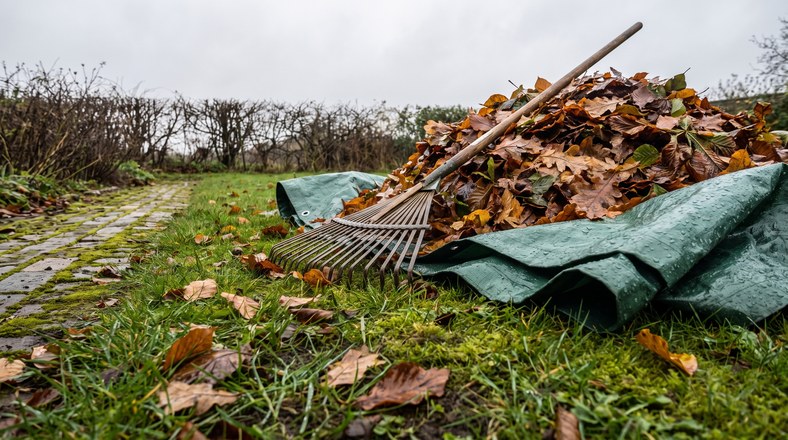
Leaf mould season runs from October through to about December, as the leaves actually come down. Do not put it off until the new year. Leaves lying on grass all winter block the light and leave yellow, dead patches, and a wet layer on a path or patio is properly slippery.
Collect after rain rather than on a bright, breezy afternoon. Damp leaves stay where you put them, pack down properly, and are already wet, which is the single factor most likely to decide whether your batch works. Dry leaves blow back across the garden while you rake and then sit in a bag doing nothing for two years.
The quickest ways to gather them
- A wide, springy leaf rake working onto an old tarpaulin, then drag the sheet to the bin. Far faster than filling and pushing a barrow.
- Leaf boards, which are just two rectangles of plywood or plastic used like oversized hands. They lift a surprising volume in one scoop.
- A rotary mower with the blades set high, run over leaves lying on the lawn. It shreds them and gathers grass clippings at the same time, which raises the nitrogen content of the finished mould.
- A blower-vac on drives, gravel and paths where a rake is awkward. Most shred as they collect, which is a real advantage.
If it is windy, rake in the direction the wind is already going rather than fighting it.
Where to take leaves from, and where not to
Your own garden first, then quiet side streets, and any neighbour glad to see the back of theirs. Avoid leaves swept from busy main roads, because they are affected by atmospheric pollution, and street sweepings hide litter you end up picking out by hand. Leave woodland floors alone, since that leaf litter is feeding the wood and providing habitat, and leave the drifts under hedges where they are, both because they feed the hedge and because hedgehogs may be hibernating in them.
Leaves that land on open borders can simply stay put for the worms to pull under. The exception is anything low and precious, such as alpines, small bulbs and rosette-forming plants, whose crowns rot if they spend the winter under a wet mat.
Expect more leaves than you think. A mature oak drops somewhere in the region of 200,000 to 500,000 in a single autumn, so two or three decent trees will fill every container you own.
Wet leaf litter is cold to handle and it hides bramble runners, rose prunings and broken glass, especially where it has drifted against a hedge bottom. Thorn-proof leather gloves with forearm protection make an afternoon of raking and bagging far less unpleasant than thin fabric gloves that soak through in ten minutes.
Sort the Good Leaves From the Slow and the Wrong Ones

Thin, soft leaves rot readily. Thick, leathery or waxy leaves resist fungal attack, mat together into airless wet layers and hold the whole batch back. Five minutes of sorting while you fill is the difference between crumbly mould in two years and a bag of recognisable leaves.
Best for a leaf pile
- Oak, beech and hornbeam. The classic three: they break down with little assistance and produce the finest, darkest leaf mould of the lot.
- Birch, alder and lime. Small and thin, they break up quickly and mix well through larger leaves.
- Ash, cherry, elm, poplar, willow and field maple. These are lower in lignin and higher in nitrogen and calcium, so they are the quickest rotters of all.
Worth knowing, because it explains a lot: lignin is the tough fibre in a leaf's cell structure, and beech, birch, hornbeam, oak and sweet chestnut are relatively high in it, which is why they are slower than ash or willow. Lignin is also what makes leaf mould valuable in soil, buffering extremes of mineral flow and holding nutrients in reserve. Slow is not the same as poor quality here.
Shred these first
- Sycamore, horse chestnut and sweet chestnut. Large and thick, they are much slower and form dense mats if added whole. Run a mower over them first, or accept an extra year, and do not let them make up the bulk of a pile. Sweet chestnut's spiny seed cases take far longer than its leaves.
Keep in a pile of their own
- Pine and other conifer needles. They may take two to three years and produce acidic leaf mould, around pH 3.5 to 4.5. Kept separate that is a feature rather than a fault: the result is ideal for mulching ericaceous plants such as rhododendrons, azaleas, camellias, Pieris and blueberries. Needles drop through the year and especially in spring, so this pile builds gradually rather than in one autumn rush.
Keep out of the leaf pile altogether
- Evergreens: holly, cherry laurel, Aucuba, bay and holm oak. Thick and leathery, they can take up to three years to rot down.
- Conifer hedge clippings, as opposed to fallen needles.
- Walnut, which contains juglone, a chemical that inhibits the growth of many plants and can suppress germination in seedlings.
- London plane. Extremely tough and waxy, three years or more, and its fine hairs can irritate the lungs once the leaves dry out.
None of that has to go in the council bin. Shred those leaves and clippings into the compost heap in modest quantities instead, where the quicker bacterial process deals with them far faster than a cold leaf pile would. A dual-chamber tumbling composter suits the awkward material well, since you can keep the tough stuff turning and aerated in one chamber while the other fills. Be clear on the point that trips people up, though: a tumbler is a warm, fast, bacterial system and leaf mould is a cold, slow, fungal one, so it is where the wrong leaves go, never a shortcut for the right ones.
One thing not to worry about: leaves marked with black spot or other leaf fungi are perfectly fine in a leaf pile.
Choose Your Method: Bin Bags or a Wire Cage
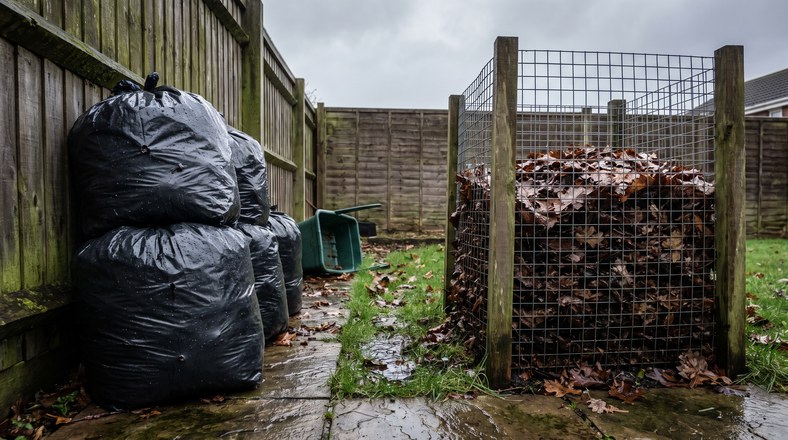
Two methods matter for a domestic garden, and honestly they finish at roughly the same time. No container makes fungi work faster. What you are choosing between is space, volume, tidiness and how much handling you want to do.
The bag method
Heavy-duty black bin bags hold roughly 60 to 80 litres each, cost nothing if you reuse them, and stack behind a shed, down the side of the house or in the corner nobody looks at. There is no smell and no mess, so they can live somewhere you would never tolerate an open heap. Reusable sacks, hessian sacks and old builders' bags are better still, since they survive being dragged about and last years. A filled builders' bag can be moved rather than emptied, which matters once the decanting starts.
Bags are also marginally faster, because the plastic traps a little warmth and moisture. Twelve to eighteen months is realistic for bagged leaves, against something closer to two years in the open. Their weaknesses are limited capacity, awkward access, and needing a shake every few months.
The wire cage method
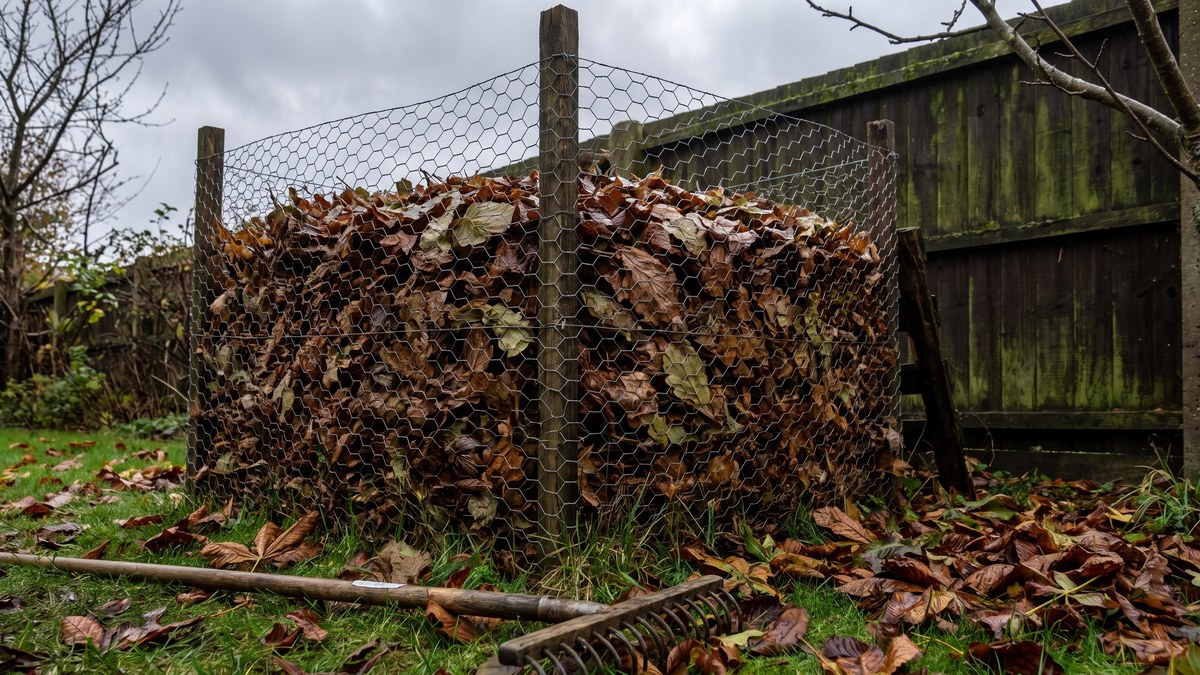
If you have mature trees, a long boundary or you are collecting from the neighbours too, build a cage. Hammer four stakes about 30cm into the ground in a one metre square, wrap galvanised mesh around the outside, wire or cable-tie it to each stake, and overlap the join by 15 to 20cm. The finished bin stands about 90cm tall and holds in the region of 500 litres, which is an average garden's entire autumn fall in one place. Bamboo canes and chicken wire do the same job for less money, and clematis stems or pulled-up runner bean stalks will contain a heap if you would rather avoid plastic and wire entirely.
Galvanised mesh lasts many years. Site the cage somewhere sheltered so the leaves are not redistributed across the garden in the first gale, and in shade or part shade, because full sun dries a pile out and dry leaves stop rotting. Ground contact is fine but, unlike a compost bin, not essential.
Which one wins
- Small garden, one or two trees, no spare corner: bags, every time. The mould is identical in quality.
- Large garden, heavy leaf fall, somewhere out of sight: a cage, and make the heap as large as you can, since bulk keeps the middle damp and hastens decay.
- Both, if you have room. Plenty of gardeners run two containers on rotation, one maturing while the other fills, which gives a usable supply every year instead of every other year.
Whichever you pick, build bigger than feels sensible. The pile is about to shrink dramatically.
Damp the Leaves Down and Pack Them In
This is the step people skip and it is the step that decides everything. Leaf mould is made by fungi, and fungal mycelium, the white threads you find running through a good pile, needs consistent moisture to grow through leaf tissue. Dry leaves do not rot. They simply wait. The usual reason a bag opened after two years still holds recognisable leaves is that it went in dry and stayed dry.
Filling a bag
- Shred first if you can. It is the most effective way to speed things up: smaller pieces give the fungi far more surface area, and shredded leaves can break down something like 40 to 50 per cent faster than whole ones.
- Fill in layers rather than in one go, watering each layer as you build. Water tipped onto the top of a full bag runs down the inside and leaves the middle bone dry.
- Aim for the feel of a wrung-out cloth: damp all the way through, not dripping.
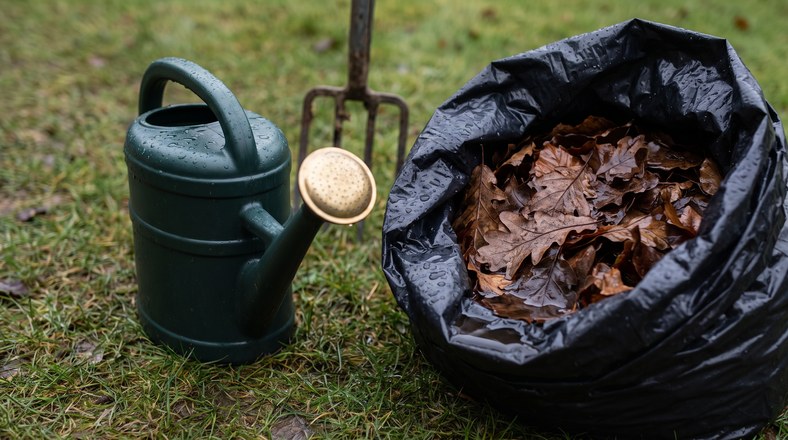
- Pierce ten to fifteen holes through the bag with a garden fork or an old knife, sides as well as top.
- Tie the top loosely. Do not seal it airtight. A sealed bag turns anaerobic and gives you a slimy, sour mess rather than sweet crumbly mould.
- Stack the bags somewhere out of the way and forget about them.
For small batches, a watering can with the rose fitted is the right tool. The rose spreads water across the surface instead of drilling a channel through the leaves, and a 6.5 litre can is light enough to keep carrying while you fill. Tip a canful over each barrowload as it goes in, and take the rose off to soak a dry patch in the middle.
Filling a cage
Same principle at a larger scale. Add leaves in layers, tread each down lightly, and water it before the next goes on. Pack them damp from the rain if you can, which saves carrying water. Fill the cage as full as it will go, because a big heap keeps its own core damp.
Optional extras that genuinely help
- Grass clippings layered through the leaves. They add nitrogen and raise the nutrient value of the finished mould, and mowing leaves off the lawn mixes them in automatically. A few handfuls per layer, not barrowloads, or you have accidentally built a compost heap.
- A few handfuls of comfrey leaves through the pile, which is rich in nitrogen and minerals that feed the fungal community.
- One watering with well diluted urine as you build the pile, as a nitrogen kick-start. It sounds odd. It works, and one application is enough.
Leave It Alone, but Never Let It Dry Out
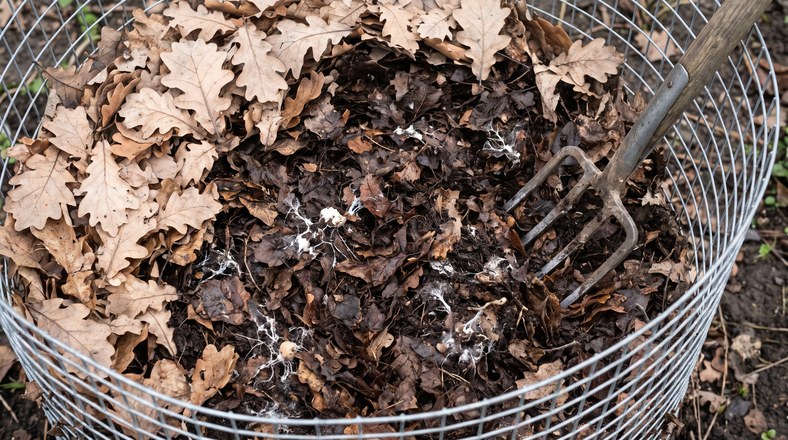
Compared with a compost heap this needs almost nothing. No feeding, no balancing of greens and browns, no sweaty weekly turning. Set a monthly reminder from April to September and give the pile two minutes.
The entire maintenance routine
- Check it is damp and water it if not. Spring and summer dry spells are the obvious risk, but autumn and winter can be dry too, so do not assume British weather has it covered.
- In a long wet spell, lay a piece of old carpet or heavy cardboard over the top of an open cage. Standing water drives the oxygen out and stalls the fungi just as effectively as drought does.
- Shake or roll each bag every three or four months to move moisture from the wet middle out to the dry edges.
- Turning an open heap is optional. One turn in April or May, forking the dry outer material into the damp centre, aerates it and speeds things along a little. Water it afterwards if it looks dry. Skipping the turn costs you time, not quality.
Wetting a large heap evenly is harder than it sounds, because a hose blasts a hole in one spot and soaks nothing else. A pump-action pressure sprayer suits the job better: pressurise it once, walk the surface laying down a fine even spray, and use the lance to reach through the holes in a stack of filled bags without untying them. A 5 litre sprayer covers a lot of ground per fill and carries easily to a heap behind a shed.
Expect the pile to collapse
The shrinkage catches everyone out the first time. One UK gardener's leaves, collected in autumn 2023, started as three full builders' bags and were down to about two thirds of a single bag by the time they were ready two years later. That is normal, and it is why decanting belongs in the routine: as the volume drops, tip two containers into one, cover the top and free the empties for this year's collection. Do that each autumn and the whole thing becomes a rolling system.
Five mistakes that ruin a batch
- Letting it dry out. By far the most common failure, and hard to spot because the outside of a pile always looks fine.
- Sealing bags airtight instead of piercing them and tying the top loosely.
- Adding whole sycamore, horse chestnut or plane leaves, which mat into wet airless layers that fungi cannot get through.
- Sweeping up leaves along a busy main road, with the pollution and litter that come with them.
- Leaving collection until the new year, by which point the lawn underneath has gone yellow and half the leaves have blown into next door's garden.
Know When It Is Ready and What Each Grade Is For
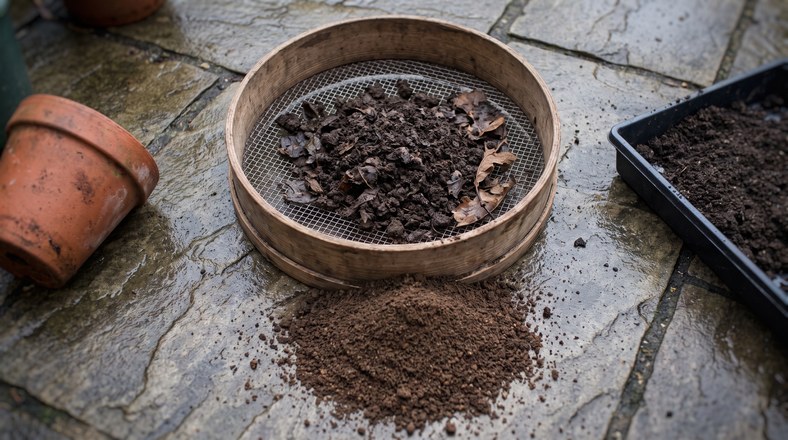
There is no single moment when leaf mould is finished. There are two useful grades, and the year one material is not a failed version of the year two one. They do different jobs, and running two containers on rotation gives you both.
After about a year: mulch grade
Coarse and part-rotted, leaf shapes still recognisable, and it crumbles when you squeeze a handful. Use it for:
- Mulching borders, shrubs, trees and vegetable beds at roughly 5 to 8cm deep, to suppress weeds and hold moisture through summer. The worms pull it down for you.
- Digging into heavy clay to open the structure and improve drainage, or into thin sandy soil to give it some body.
- An autumn top dressing on the lawn, which keeps the soil life under the grass well fed.
- A winter blanket over bare vegetable beds, protecting the soil surface from winter rains that wash nutrients out.
After two years: seed and potting grade
Dark brown, fine and crumbly, with no real trace of the original leaves and a clean smell like a woodland floor. Sieve it through a 6mm mesh and it stands comparison with bought peat-free seed compost. Use it for:
- Seed sowing, sieved on its own or mixed with equal parts sharp sand. Its fine crumb is what small seeds need to germinate into, and the low fertility suits them.
- Homemade potting compost: equal parts sieved leaf mould, sharp sand, loam and garden compost.
- Conditioning soil anywhere you want structure rather than feed. Well-rotted leaf mould can hold up to 500 per cent of its own weight in water, which is why it helps clay and sand alike.
- Woodland-edge planting around ferns, hostas and shade lovers, where it mimics the leaf litter those plants evolved in.
The nutrient point most guides skip
Leaf mould is low in nutrients by design rather than accident. A tree reabsorbs most of the goodness from its leaves before they drop, leaving mainly lignin. Low fertility is ideal for germinating seeds and fine for conditioning soil, but it is not enough on its own for anything that has to grow on in a pot for months.
So for containers and potting on, blend it. The traditional recipe is equal parts leaf mould, sharp sand, loam and garden compost, and with no loam to hand, working a multi-purpose compost through sieved leaf mould puts back the nutrients the leaves never had. A 40 litre bag stretches a long way that way, and the leaf mould brings the water-holding and open texture bagged compost often lacks.
Two cautions. Leaf heaps get colonised by weeds and their seeds, so keep the finished material away from anywhere a flush of weed seedlings would be a nuisance, and sieve it before it goes near a seed tray. And keep pine needle mould for the ericaceous plants rather than spreading it about the garden generally.
Frequently Asked Questions
How long does leaf mould actually take in the UK?
Reckon on one to two years. After about a year you have a coarse mulch grade with leaf shapes still visible, and after two years a fine, dark, crumbly material good enough for seed sowing. Bagged leaves tend to be at the quicker end, around twelve to eighteen months, because the plastic holds warmth and moisture in. Conifer needles take two to three years, and evergreens and London plane can take three or more, which is exactly why they are better off in the compost heap.
Can I make leaf mould in a compost bin or a tumbler instead?
No, and it is worth understanding why. Compost bins and tumblers work through bacteria in a warm, fast, aerobic process, while leaves are broken down by fungi in a cold, slow one. Large quantities of leaves will sit in a compost bin largely unchanged and slow the rest of the heap down, so they are better recycled separately. The exception runs the other way: evergreen leaves, conifer clippings and very thick leaves are too slow for a leaf pile and should be shredded into the compost heap in modest quantities.
Do I have to shred the leaves first?
Not for oak, beech, hornbeam, birch or the other thin leaves, which break down happily whole. Sycamore, horse chestnut, sweet chestnut and walnut really do need shredding, or they form dense mats and take an extra year. The easiest shredder most people already own is a rotary mower: sweep the leaves onto the lawn, run the mower over them with the blades set high, and it shreds and collects them along with some grass clippings in one pass. Shredding can cut decomposition time by something like 40 to 50 per cent.
Why has my bag of leaves not broken down after two years?
Almost always because it dried out. Fungal mycelium needs steady moisture, and once leaves dry the process simply stops until they are wetted again, which is why bags filled with crisp leaves on a sunny afternoon so often disappoint. The other common causes are sealing the bag airtight, which turns it slimy and sour instead of crumbly, and packing it with whole thick leaves such as sycamore or horse chestnut that mat together and shut out air. Open the bag, break up the mats, water it thoroughly, pierce more holes and give it another year.
Related Reading
- How to Prepare Your UK Vegetable Garden for Autumn: Complete Seasonal Guide
- How to Repair Bare Lawn Patches in Autumn (UK Guide)
Disclaimer: This article contains Amazon affiliate links. We may earn a small commission from qualifying purchases at no extra cost to you.